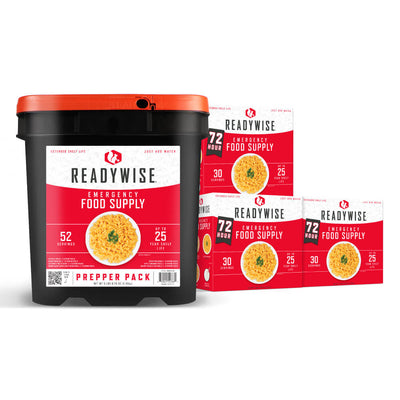
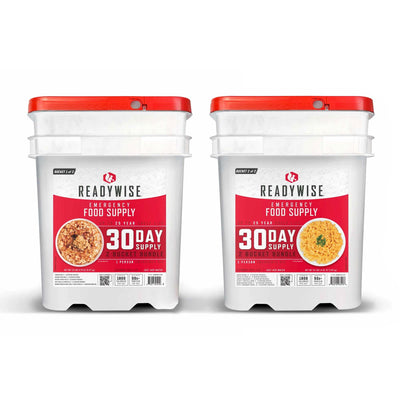
Freeze-dried food has transcended its origins as an emergency staple, becoming a versatile solution for outdoor adventurers, busy professionals, and anyone seeking quick, hassle-free meals.
Whether you're prepping for a camping trip, stocking your pantry for unexpected situations, or meal prepping for the week ahead, freeze-dried food is an innovative way to enjoy flavorful, nutritious meals with minimal effort.
This guide is designed to equip you with the knowledge and confidence to prepare freeze-dried food effectively, step by step. From understanding the freeze-drying process to adding the final touches, you'll be ready to master the art of cooking with freeze-dried ingredients.
Understanding Freeze-Dried Food
Freeze-dried food is a type of food that has been rapidly frozen and then exposed to a process called sublimation, where moisture is removed by converting ice directly into vapor. This process preserves the structure, flavor, and nutrients of the food while extending its shelf life.1
Unlike dehydrated food, which uses heat to remove moisture, freeze-dried food maintains more of its original taste, smell, and texture.2
Because of this, the benefits of freeze-dried food are bountiful2:
-
Nutrient retention – Unlike traditional drying methods, freeze-drying preserves the majority of the food's nutrients.
-
Extended shelf life – Freeze-dried meals can last 25 years or more if stored properly.
-
Lightweight and portable – Ideal for outdoor adventures, freeze-dried food is easy to pack and carry.
-
Quick preparation – Just add water, and your meal is ready to eat in minutes.
Freeze-dried food also comes in a wide range of options. These include:
-
Fruits, like apples, strawberries, bananas, and blueberries.
-
Vegetables, like peas, corn, carrots, and green beans.
-
Protein, such as chicken, beef, shrimp, and even plant-based proteins.
Full freeze-dried meals, such as pasta dishes, soups, stews, and breakfast options, are also available.
So, how do you cook freeze-dried food? It all starts with having the right supplies.
Step 1: Gather Necessary Supplies
To begin, you’ll need to gather measuring cups and spoons. Accurate water-to-food ratios are key when preparing freeze-dried meals. Too much water can lead to a soupy mess, while too little may leave your food chewy and under-hydrated. Measuring cups and spoons help you follow package instructions precisely, ensuring perfect texture every time.
For outdoor adventures, consider collapsible silicone measuring cups—they’re lightweight, compact, and easy to pack.
Depending on where you're preparing your freeze-dried food, your heat source will vary. Here are some options:
-
Portable camping stoves – Ideal for outdoor adventures, camping stoves are lightweight, reliable, and efficient. Choose between fuel-based stoves (like butane, propane, or isobutane) or multi-fuel stoves that can use gasoline or kerosene. Always pack extra fuel canisters and check local fire regulations before lighting up in wilderness areas.
-
Microwave – At home, a microwave is one of the quickest ways to heat water for rehydration. Just be sure to use microwave-safe bowls and containers.
-
Electric kettle – Perfect for boiling water rapidly with minimal effort, an electric kettle is useful for preparing freeze-dried meals during power outages (if you have a backup generator) or for quick meals at home or in the office.
-
Thermos or insulated flask – If you’re on the move and don’t have immediate access to heat, an insulated flask keeps water hot for hours, allowing you to rehydrate meals on the go. In fact, some high-quality thermoses can keep water hot for up to 12 hours.
To enhance your experience, consider customizing your freeze-dried meal to boost its flavor profile:
-
Seasoning – Grab a few pre-mixed seasonings for the road. Think garlic powder, Italian seasoning, chili flakes, or taco seasoning. Pre-portion these into small ziplock bags or reusable containers for easy access. Also, consider a portable salt and pepper shaker set for outdoor adventures.
-
Condiments – Mini bottles of hot sauce, soy sauce, or Sriracha can transform a simple freeze-dried meal into a gourmet experience.
-
Garnishes – Dried herbs like parsley, cilantro, or chives can add both flavor and color. You can also include grated cheeses like parmesan for pasta and soup dishes.
Step 2: Rehydrate the Freeze-Dried Food
Freeze-dried food begins as a pile of brittle flakes or crunchy morsels, but the right amount of water and a little patience will transform it into a delicious, satisfying meal you can rely on.
That said, knowing how to rehydrate freeze-dried food effectively ensures you get the texture, flavor, and nutritional benefits you expect.
Rehydration works by reintroducing moisture to freeze-dried food, restoring it to its original state. When you add water back, the food soaks it up like a sponge, regaining its original texture, flavor, and nutritional content.
That said, water temperature plays a crucial role in the rehydration process, and the right temperature depends on the type of freeze-dried food you're preparing:
-
Boiling water – This is best for freeze-dried meals that need to be softened thoroughly like stews, soups, pasta, rice dishes, and chicken, beef, or scrambled eggs.
-
Hot water – Hot water works well to preserve texture and flavor without fully boiling the food. Use it when preparing foods like oatmeal, couscous, peas, corn, or green beans.
-
Room-temperature water – If you find yourself in a situation where you don’t have access to heat, such as a day hike, colder water can still rehydrate your food, although it may take longer. You can use colder temperatures for freeze-dried fruits, vegetables, or yogurt bites.
When preparing your meal, pour the measured water over the freeze-dried food, and ensure all pieces are submerged to prevent uneven rehydration. Be aware that grains and pasta will expand upon rehydration, so you may want to move them to a larger container.
Once poured, stir the food thoroughly. Stirring helps distribute water evenly, prevents clumping, and ensures there are no dry pieces remaining. This step is especially important for foods with smaller pieces, like soups or pasta dishes.
Then, if using hot water, cover the food and wait for it to fully rehydrate. Typically, full meals will take longer than fruits or vegetables.
After the suggested time, give the food a final stir and check for texture. If the food is still dry or tough, add a little more water and let it sit for another minute or two. If it’s too soupy, let it sit uncovered for a few minutes to allow excess water to evaporate.
If you find that your food is mushy or water-logged, you may have oversoaked it. In this case, drain excess water and use the food in a dish where moisture is an asset, like a soup or stew. For meals like rice or pasta, you can sauté the food in a skillet to cook off excess moisture.
If the food is still crunchy or tough, add a small amount of hot water, stir, and let it sit for another few minutes. Patience is key here—giving the food a little extra time often solves the problem.
Step 3: Cooking After Rehydration
Rehydration may restore freeze-dried food to its original state, but sometimes, the journey doesn’t end there. While many freeze-dried foods are ready to eat after rehydration, others benefit from a little extra cooking to enhance flavor and texture.
Generally, fruits, vegetables, and simple meals like oatmeal do not require additional cooking. However, you may want to add extra heat to:
-
Proteins – Chicken, beef, pork, and scrambled eggs often need cooking to achieve optimal tenderness and flavor.
-
Complete meals – Pasta dishes, stews, rice bowls, or chili can be elevated with a brief simmer or sauté.
-
Baked goods – Incorporating rehydrated ingredients into muffins, pancakes, or casseroles often requires additional cooking.
To properly reheat your food post-rehydration, consider:
-
Sautéing – Sautéing is a quick and effective way to add depth to rehydrated proteins and vegetables and add flavor with oil, butter, garlic, or herbs. First, heat your skillet. Then, add your rehydrated ingredients and cook until they’re golden brown.
-
Simmering – Simmering rehydrated foods is ideal for soups, stews, and saucy dishes. In a pot, combine your rehydrated ingredients with the seasonings and/or sauces of your choosing. Heat the ingredients over medium heat until there’s a rolling boil, then allow them to simmer for up to 15 minutes. Cool and enjoy!
-
Baking – Incorporating rehydrated ingredients into baked dishes like casseroles, muffins, or pies can add a creative twist to your freeze-dried meal prep. After rehydrating the food, fold the ingredients into the batter or prepared mixture and bake it in the oven, following the baking instructions carefully.
Step 4: Season and Serve
Freeze-dried meals can benefit from a bit of creativity. As explored, seasoning is the secret ingredient to making your dishes shine. Consider adding:
-
Garlic, chives, or smoked paprika to freeze-dried potatoes
-
Cinnamon or nutmeg to rehydrated apples
-
Salt, pepper, and fresh herbs to soups and stews
-
Fresh cheese, sour cream, or avocado to freeze-dried chilis
You can also incorporate your freeze-dried ingredients into wraps, salads, or side dishes.
Step 5: Storage and Leftovers
If you’re unable to finish your freeze-dried meal, you can save the leftovers. For the short term, refrigerate your food in an air-tight container for up to three days. You can also freeze your rehydrated meals for long-term storage.
To prevent food waste, consider:
-
Turning leftover stew into a savory pie filling
-
Using extra rehydrated fruit in oatmeal or smoothies
-
Adding rehydrated vegetables to soups or pasta sauces
Step 6: Cleaning Up
Especially when outdoors, cleanup should be simple, efficient, and eco-friendly. Here are some essential tools and tips for quick cleanup:
-
Biodegradable soap – Unlike regular soap, biodegradable soap breaks down naturally without harming the environment, making it perfect for camping, hiking, or emergencies.
-
Disinfectant wipes – Disinfectant wipes are key for a no-fuss cleanup, especially when running water is scarce. They help you quickly sanitize cookware, surfaces, and utensils with minimal effort.
-
Quick-dry towels – Quick-dry towels are compact, absorbent, and designed to dry rapidly, making them perfect for outdoor cooking or emergency situations. They're ideal for drying dishes, wiping surfaces, and even drying your hands.
Also, stick to one-pot meals and simple tools to streamline prep and cleanup.
Tips for Success
Make your freeze-dried cooking experience even better with these tips:
-
Stay organized – Keep an inventory of your emergency stockpile, noting expiration dates.
-
Experiment – Don’t be afraid to mix and match ingredients for new flavors.
-
Hydrate wisely – Use proper water ratios to ensure the best texture and flavor.
Explore ReadyWise's Freeze-Dried Food Selection
Preparing freeze-dried food is simple, versatile, and ideal for many situations—from creating quick meals for your outdoor adventures to ensuring emergency preparedness.
With ReadyWise’s wide selection of flavorful options, you can confidently incorporate freeze-dried ingredients into everyday cooking or long-term storage plans. Experiment, get creative, and discover how easy it is to enjoy delicious, hassle-free meals with ReadyWise.
Sources:
- Healthline. Freeze Drying. https://www.healthline.com/nutrition/freeze-drying
- Foods. The Freeze-Drying of Foods—The Characteristic of the Process Course and the Effect of Its Parameters on the Physical Properties of Food Materials. https://pmc.ncbi.nlm.nih.gov/articles/PMC7603155/


Your claims for emergency use are misleading, as much of your food requires multiple cups of water, and regulated heat. Both will be in short supply if power is off, so only meals that can eat after adding a cup of hot water should be offered. I’m having to cook your food with traditional methods, and will look for easy prep freeze dried foods for emergencies.